Products
Solutions
Resources
9977 N 90th Street, Suite 250 Scottsdale, AZ 85258 | 1-800-637-7496
© 2024 InEight, Inc. All Rights Reserved | Privacy Statement | Terms of Service | Cookie Policy | Do not sell/share my information

On the appropriate Form builder or Task builder page, the Properties tab contains the basic information entered when the form was created (on the Create a form or Create a task dialog box). This includes a header section containing the following:
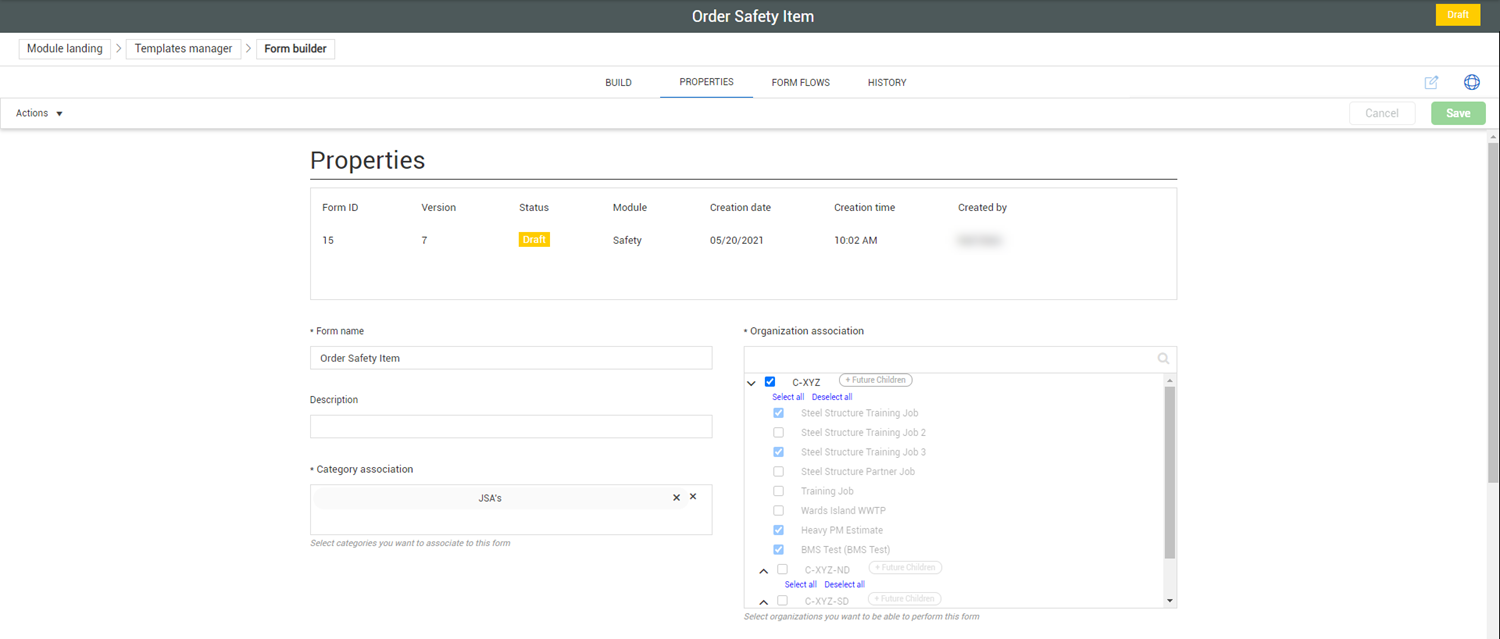
The Properties tab also includes the following fields, which you can edit at any time with the right permissions:
In Form builder, both the Event title and Event date fields have the option of being System defined or User defined. Both can be used strategically to personalize your form.

| System Default | User Defined | |
|---|---|---|
|
Event title |
The event title defaults to the "name of the form_event ID" and is presented on the event list as the event title. |
This provides a mandatory text question on the form where the user can provide a title that is presented on the events list as the event title. |
|
Event date |
The event date defaults to the date the form was started. |
This provides a mandatory date question on the form where the user can provide a date that is presented on the events list as the event date. |
In Task builder, both Task title and Due date can be used strategically to personalize your task.
| System Default | User Defined | |
|---|---|---|
| Task title | The task title defaults to the "name of the task_task ID" and is presented on the task list as the task title. | This provides a mandatory text question on the template where the user can provide a title that is presented on the task list as the task title. |
| Due date | Not applicable | This provides a mandatory date question on the template where the user can provide a date that is presented on the task list as the due date. |
Notice that when the Add expiration date check box is selected, the Add renewal date option is shown.
Selecting Add expiration date makes this a mandatory field on the form. If selected, the Add renewal date also provides a mandatory question on the form.
|
Definition |
|
|---|---|
|
Add expiration date |
This selection provides a mandatory date of expiration question on the form. This question and the value show on the event list as well after the form has been filled out. |
|
Add renewal date |
This selection provides a mandatory date of renewal question on the form. This question and the value show on the event list as well after the form has been filled out. |
After the form is published, only certain fields in the properties may be changed without putting the form into a draft status.
To hide a template from being started as a stand-alone form or task, turn on the Available through form button only? toggle. When hidden, these templates can be used only through association with the Form Button.
You can add an integration tag to a template to include the form in reporting. Specific questions in that form with the same integration tag are then reported on. This applies only to standard reports.
Template integration is helpful when you need to use a task in InEight Change. For more information about template integration, see Template Integration.
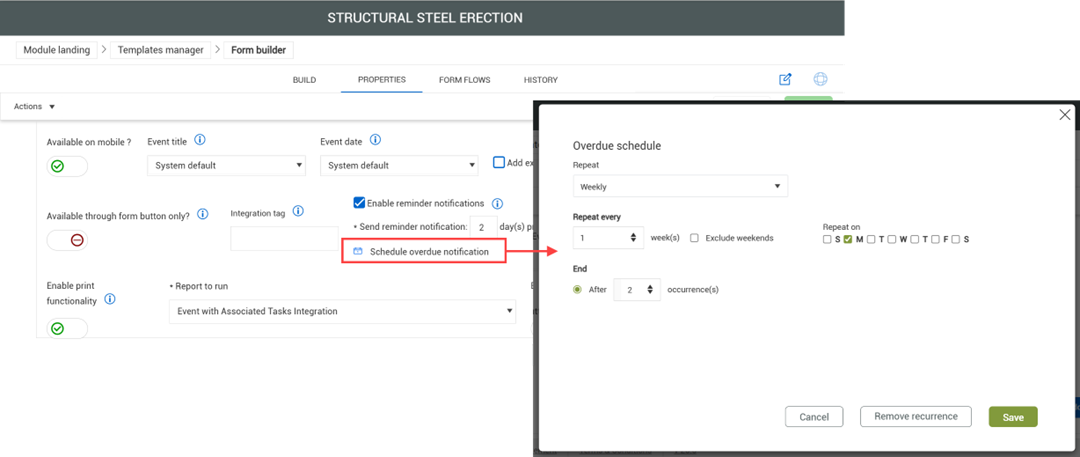
You can schedule recurring overdue notification reminders to repeat daily or weekly, with options to exclude weekends and limit the number of occurrences.
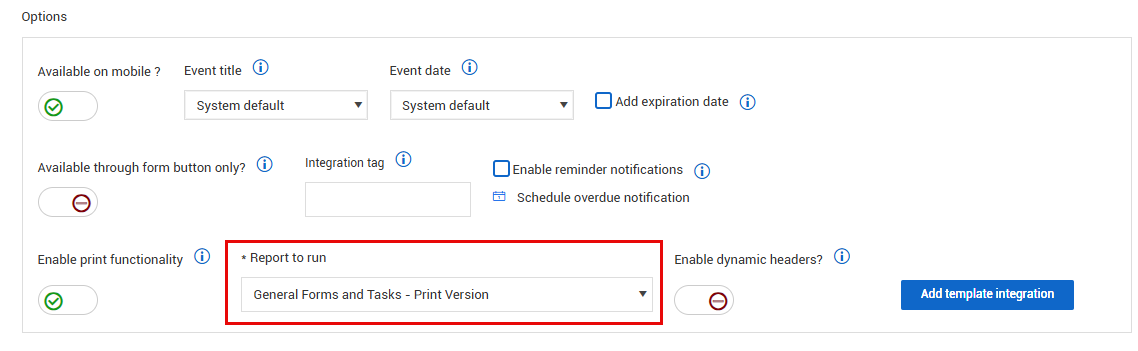
You can enable a template to be printable from the Events or Tasks page, and from the event or task detail page.
Pay special attention when enabling the print feature. This feature does not contain any permissions associated with the event or task. If you have access to the work item and can print it, you can print all questions and answers in the work item.
To enable a template to be printable, turn on Enable print functionality, and then select which report to run. Currently, only the Compliance General Forms Integration is available.
You can select from three layout options to print reports. A traditional vertical report, a condensed layout that follows your template structure, or a combined report that includes an event with its associated tasks and forms. Reports are downloaded as PDFs with file names based on the template name followed by the Event or Task ID.
Template language settings let you import translations for each question and section in a Microsoft Excel spreadsheet. For more information about how to import translations, see Template Translation.
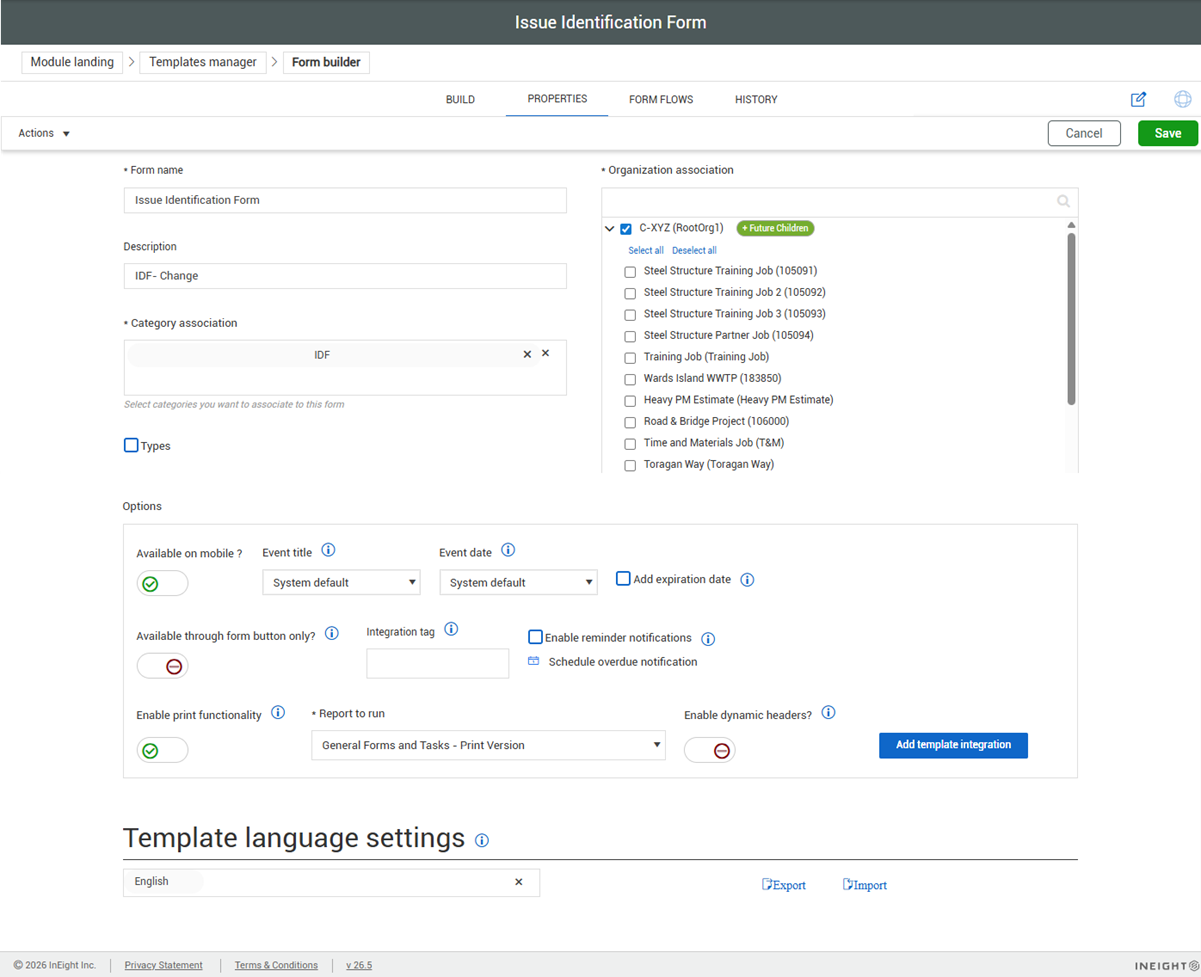
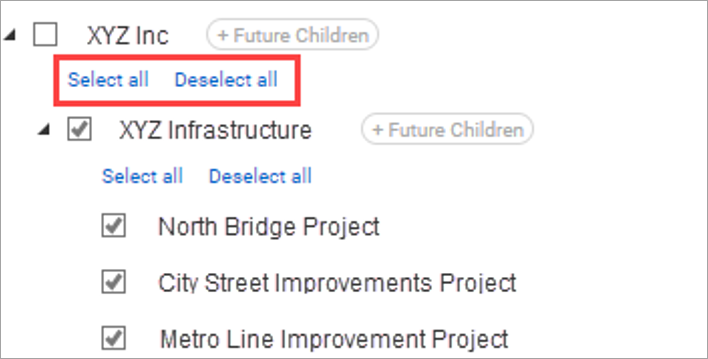
On the Properties tab, selecting a project is as simple as selecting the check box next to the project name.
In any parent level, you can click the Select all or Deselect all option, if appropriate.
Projects not available to you are grayed out.
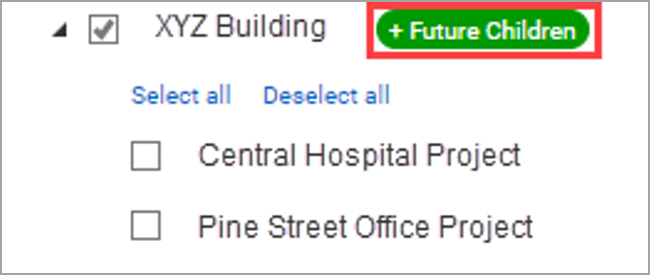
Clicking the + Future Children button in a parent organization allows you to associate templates and users with that parent organization and all its children with just one click. The association can also persist through any new children (projects) that get associated after the original selection, so you do not have to manually add each project.
After the + Future Children button is selected, it changes color.
When you select a parent organization, only that organization is selected. If the parent organization has child suborganizations or projects, those children are not automatically selected when you select their parent. This change gives you the flexibility to fine-tune which children to associate.
The Select all and Deselect all buttons are available for each parent organization with children. When you use these buttons, only the children are selected or deselected. The parent organization is not affected.
When you select all, only existing children are selected. New projects are not automatically selected unless you use the + Future Children option. See the next section for more information.
The + Future Children button is available for each parent organization. If you enable this option, all new children of that parent are automatically selected. This option prevents having to constantly select each new project when you create one.
The + Future Children option works independently of the Select all option. For example, if you want to select all future new projects, but not necessarily all existing ones, you could select a few existing projects, or none, and still enable + Future Children.
Custom IDs let you sort and filter forms and tasks for better management of your events and tasks. You can also assign multiple custom IDs to one template and add or remove properties for existing custom IDs.
The following Step by Step shows you how to create a custom ID.
Click Actions > Manage custom IDs in the upper-left of the Form or Task builder's Properties tab.
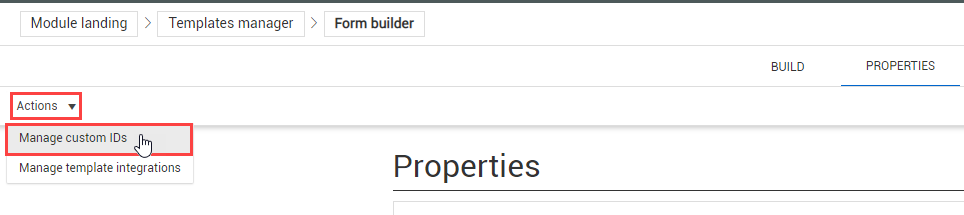
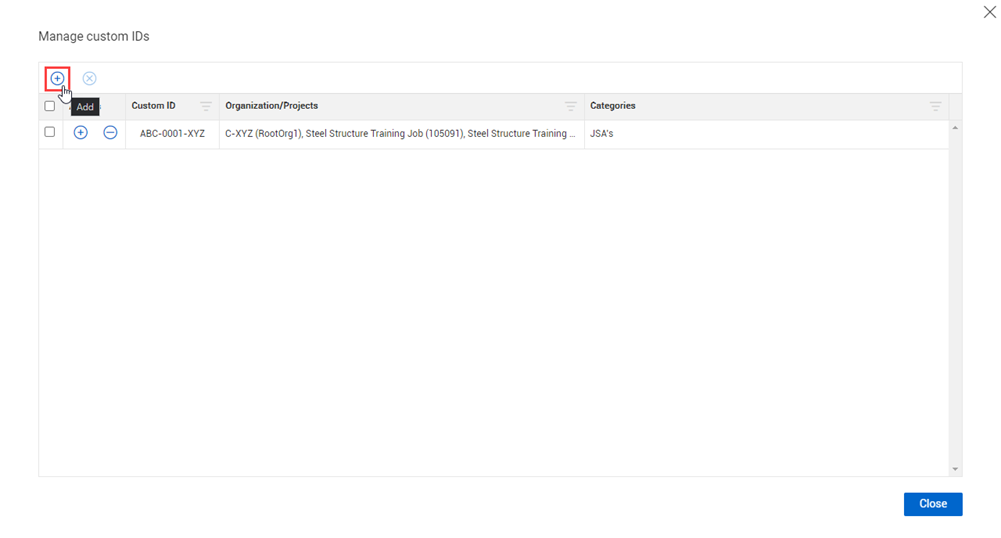
The Manage custom IDs dialog box opens
Click the Add icon to open the Add custom ID wizard.
Enter values in the Prefix, Starting number, and Suffix fields, and then click Next.
You must fill out at least one of the fields, but you are not required to fill out all of them.
Each of the fields can be up to 10 characters long. Prefix and Suffix are alphanumeric, and Starting number is only numeric.
Select the organizations and projects you want the custom ID associated with.
Optionally, select Apply this custom ID to each selected project.
When this option is selected, the custom ID number increases independently for each project. For example, if the custom ID starts at CUS-200-ID and this option is selected, when you perform the form or task twice in Org/Project 1, the ID increases from CUS-200-ID to CUS-201-ID. If you then perform the same form or task twice in Org/Project 2, the ID also increases from CUS-200-ID to CUS-201-ID independently from the ID numbering in Org/Project 1.
Select the categories you want the custom ID associated with.
Click Save & close.
You can also click Save & add new to immediately add another custom ID.
When viewing the projects list, values in the Custom ID column are shown as hyperlinks to easily open associated activities. You can also find a custom ID column in the Reference slide out panel. This lets you quickly associate or reference other activities using a Custom ID instead of just the event or task ID.
Additional Information
9977 N 90th Street, Suite 250 Scottsdale, AZ 85258 | 1-800-637-7496
© 2024 InEight, Inc. All Rights Reserved | Privacy Statement | Terms of Service | Cookie Policy | Do not sell/share my information